
Lesson 1: Your First Loaf
Learning the fundamentals of bread.
If you have ever looked around the average cookbook for a bread recipe chances are you've encountered this:
"Combine all ingredients and knead dough for 5-10 mins or until dough is smooth and bounces back when poked. Dough should feel slightly tacky. If not, add flour. Put dough in a warm place until double in size. Punch down and allow to double again. Shape dough and allow to double then bake."
What you just read is EVERY BREAD RECIPE EVER. That is, every generic recipe found in cookbooks written by cooks and NOT bakers. This recipe will make bread but there is a fine chance it won't be your dream loaf. If this is the only type of bread recipe you've seen then the lesson that follows might be a bit jarring to you("There's no kneading?!") but hang in there. Our goal with this lesson is partly to introduce you to the basic steps and stages of baking bread but also to show you that the way you have been making bread is not the only way and definitely not the best way in terms of consistency, control and ease.
Note: This lesson may appear intimidating for some. There is a lot of information and steps to consider and it can seem difficult or complex at first. However, it is necessary to go into so much detail in the first lesson because we want you to learn the process of baking bread the right way from the beginning. This will give you the best possible opportunity to succeed in your baking. If you power through this lesson and get the process down I assure you that things will get easier! In fact, this will most likely be the most difficult lesson on this website. And since most lessons on this site will be based on the process demonstrated in this first lesson you will have plenty of opportunities to practice and things will get easier. Okay enough rambling. On with the lesson!
The Loaf

For your first loaf at a breaducation you will be making a white sandwich loaf bread. This is the kind of bread that billions (trillions?) of PB&Js have been made on and a good portion of Americans were raised on. You may be thinking "Wonder Bread" right now but you can be assured that this loaf will be quite a bit better.
We chose to start you on this loaf for several reasons. First off, this bread is fairly simple. It doesn't have a lot of ingredients and it's what is known as a "straight dough". A straight dough is a bread that is created and baked the same day. It doesn't contain any preferments or starters which are ways a baker can add flavor to bread by pre-fermenting some of the flour in a bread recipe(something we will be getting into in future lessons). In other words, a straight dough is the simplest kind of bread to make and is therefore a great place for a beginner to start and learn the steps of bread baking with out having to focus on a lot of other concepts or techniques.
The Formula
All recipes on a breaducation will be written in grams and have two single loaf batch sizes, one for a 9 in. x 5 in. pan and one for a 8.5 in. x 4.5 in. pan. Feel free to double or triple batch sizes if you want to make more loaves. All formulas will also include baker's percentages which you will learn about in future lessons. Baker's percentage will become extremely important later on for customizing loaves but for the time being we want you to just focus on learning the process and techniques of bread baking.
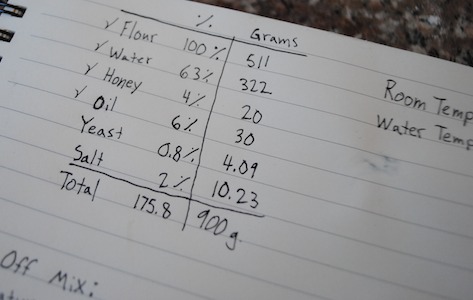
Formula - White Sandwich Bread
| Baker's % | Ingredient | 9x5 Pan | 8.5x4.5 Pan |
|---|---|---|---|
| 100.00 | Flour | 508.00 | 339.00 |
| 63.00 | Water | 320.00 | 214.00 |
| 4.00 | Honey | 20.00 | 14.00 |
| 6.00 | Oil | 30.00 | 20.00 |
| 2.00 | Yeast | 10.16 | 6.77 |
| 2.00 | Salt | 10.16 | 6.77 |
| 177.00 | Total | 900.00 | 600.00 |
Ingredients
Before we begin to mix our dough we should discuss the ingredients we will be using. We will have a more in-depth discussion on ingredients in a future lesson but there are a few basic things you should know first.
Flour
The flour we use for bread baking should never be bleached or bromated. It is fine to use all-purpose or bread flour but don't use pastry flour because the protein percentage is too low and we will not be able to develop enough gluten structure to get significant rise on our loaves. Also, do not use high-gluten flour as this will have the opposite effect: the dough will be too strong and will be excessively chewy. All purpose and bread flours generally fall in a protein content range of 10.5%-14% where all purpose falls on the low end of that range and bread flour on the high end. This is the range we want to be in.
Use of organic flour is up to you and should not differ in performance much from non-organic flours.
Water
The water for baking bread need not be anything special. You don't need special mountain spring water or anything along those lines to make great bread. Most tap water will be completely fine for use. If you can drink the water it is generally fine for bread.
An area of possible concern for water, however, is if it has excessive chlorine content which could possibly inhibit yeast activity. If you believe your water may have to much chlorine content you can simply leave the water out over night which will cause the chlorine to dissipate.
The most important factor to consider for water use in bread is regulating it's temperature because it, in turn, regulates dough temperature which is very important in controlling fermentation. When executing any bread formula make sure you have an instant-read thermometer at the ready.
Oil
The oil we're using in this recipe should be a neutral vegetable oil such as canola oil. The point of the oil in this recipe is not to flavor the bread but to give it a softer more uniform crumb. In general, this is what any kind of fat will do to the bread. If you do not have a neutral flavored oil on hand then olive oil is fine.
Yeast
The yeast at a breaducation will always be instant yeast. Other yeast types like active dry or fresh yeast are fine to use but you will need to convert them from the called for instant yeast amount to get the proper quantities. If you need to convert, we have a handy online yeast converter that will do all the calculations for you located here.
Salt
Like water, most any salt will do for bread baking. Cheap grocery store brand will work just as well and result in the same flavors as more expensive sea salts.
Scaling

The process of making bread begins with scaling the ingredients. It may seem pretty straight forward but there are a few tricks that help make things more consistent.
Scaling Small Ingredients
It is wise to scale small ingredients like yeast and salt separately from the bigger ingredients like flour and water. These ingredients are in such small quantities and have such a profound effect on the end result of the bread that accurate measurement is very important.
You will also want to make sure the scale is actually reading what you are scaling. Scales have a nasty habit of not reading very light ingredients like yeast too well. If you find yourself pouring more and more yeast into a container and the scale is still reading zero then start over and try pouring a little faster initially. This will usually eleviate the problem.
Scaling Order
We will use the following scaling order for most breads we do at a breaducation. We have found that this order produces the most consistent results in our bread.
- Scale the salt and yeast into separate containers and set aside.
- Scale the water into the mixing bowl making sure it is the desired temperature. For this recipe use 76 degree water.
- Pour yeast into the water and stir. This ensures that all the yeast gets hydrated and active.
- Scale the honey and the oil directly into the yeast/water mixture.
- Scale the flour into the liquid mixture from previous step.
- Finally pour the salt on top of the flour. Adding the salt at this stage ensures it doesn't come into too close of contact with the yeast which could potentially inhibit its activity.
- You are now done with scaling and are ready to combine the ingredients into a dough!
Mixing
Once you have all your ingredients in the bowl you are ready to begin mixing and create a dough.
First, combine all the ingredients together using your hands, a spoon or a spatula. Once the dough starts to come together switch to just using your hands and squeeze dough through your fingers in order to incorporate all the ingredients evenly:


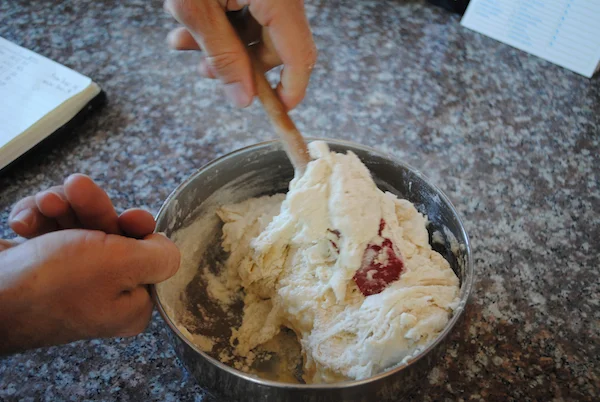

The goal with this first stage of the mixing is just to get all the ingredients properly hydrated and combined. We're not trying to give the dough any strength here. The dough will probably feel quite sticky at this point and you may be tempted to add flour but don't. As we give the dough strength it will become much less sticky and much more manageable. Also, adding enough flour to make the dough less sticky would throw off our formula as all the ingredients are added in relation to the amount of flour in the dough. If you change the amount of flour you will also be changing these relationships and you will end up with a different product then you set out to make.
Once you are finished thoroughly combining all the ingredients the dough should resemble a shaggy mass with no real structure:
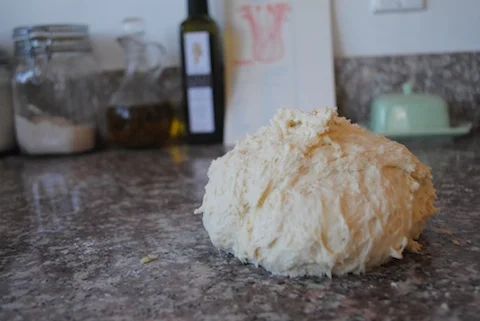
The dough just after incorporation of the ingredients. Note the shagginess.
This step should take no more than five minutes. If you are spending much more time than that you are working harder than you have to.
You are now going to let the dough sit and rest covered for 5 minutes. However, before you do, take the temperature of the dough and write it down along with the time. The temperature should ideally be in the range of 73-78 degrees. If it is too warm simply keep it in the fridge for the 5 minute rest. If it is too cold then turn on your oven for 30 seconds or so, just enough to get it around 90 degrees, and then turn it off. The dough can then spend the 5 minute rest in the oven and warm up some. Also, write down the temperature of the water you used. If the dough didn't end up between 73 and 76 degrees adjust the water temperature next time accordingly.
A nice trick is to cover the dough with your mixing bowl while resting.
"What is the reason for the five minute rest?", you ask. Well we are going to let time do the work that we would normally have to do ourselves. Time is going to give our dough strength. This is what we would be trying to accomplish normally with the customary 10-15 minute kneading session most recipes have us engage in. But all the kneading is completely unnecessary. Time will accomplish the same thing for us without all the work. We simply need to fold the dough once every five minutes for the first 15 minutes of fermentation. This folding is enough to develop gluten in the dough when combined with resting.
Folding
To do a fold, start by flattening the dough slightly on the counter or work surface and then grab an edge of the dough, lightly stretch it until you feel resistance and fold it about 1/3rd of the way over the rest of the dough. Repeat on all four sides of the dough and then flip the dough back over so the smooth side is on top:

The dough will likely want to stick to your hands when doing your folds but don't add flour. Instead, moisten your hands with a little water between each step of the fold. The dough won't stick to wet hands.
After the initial five minute rest give the dough one complete fold and rest the dough for another five minutes. We will continue this process until the dough has been folded three times.
Notice how with each successive fold the dough is becoming more springy and smoother. You should also be experiencing more resistance when stretching out the dough for the folds. These are signs that the dough is gaining strength which is exactly what we want. This strength will allow the dough to trap the carbon dioxide produced by the yeast which will in turn raise the dough.
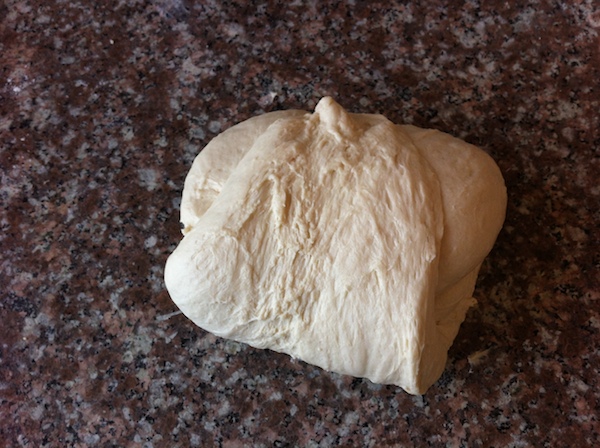
The dough after three folds. Note how much smoother it looks compared to the just mixed photo.
Bulk Fermentation
Bulk fermentation is a more technical and accurate term for what is commonly referred to as "the first rise". We call it bulk fermentation because this is when the dough is fermenting as one big bulk before it is divided into smaller loaves(something we won't be doing in this lesson because our formula is already a single loaf size and needs no dividing). This stage is very important for the bread for several reasons. First off, this is the phase where most of the flavor of the bread is developed as better fermentation is achieved with larger masses of dough. In general, the longer you bulk ferment the dough the better flavor your bread will have. The time spent in bulk fermentation also increases the strength of the dough which we will need when we go to shape our loaves.
To bulk ferment the dough simply put the dough in an oiled bowl and cover it with plastic wrap. That's it! You can just let it do its thing. You may want to check the dough temperature at this point, however, and if it is cooler, say under 75 degrees, keep it in a warmer place in your house. You could try the oven trick I mentioned earlier. If, instead, your dough is too warm you can put it in the fridge for the first 5 minutes of bulk.
For this formula, the bulk fermentation will be around 1 hour. I say around because everyone's dough will ferment at different rates based on the temperature of the dough. If your dough is a little cold, say 70 degrees, the bulk fermentation could be an hour and half. If your dough is fairly warm, perhaps around 80 degrees, you may want to cut your bulk fermentation to around 45 minutes. This is where you need to be able to read your dough and know what the dough should look and feel like at the end of bulk fermentation. Here are some key things to look for to help you determine if you have bulked your dough long enough(or too long):
- The dough should seem active. That is, it should feel a little gassy. It will be a bit lighter to the touch and not feel quite as dense as it did at the beginning of bulk fermentation. It should feel like the yeast is doing something. If the dough feels about the same as when the bulk fermentation started then you either haven't let it go long enough or something is wrong.
- The dough will gain volume. You don't want it to double in size but there should be a noticeable gain in volume. Somewhere around a 50% to 75% size increase.
- You should notice some air bubbles on the surface of the dough. This is a sign that the yeast is doing it's job.
- If you poke the dough it should spring back. If it doesn't spring back then you have gone too far and your loaves might not rise too well in the oven because the yeast have already exhausted their supply of food(sugars in the flour).
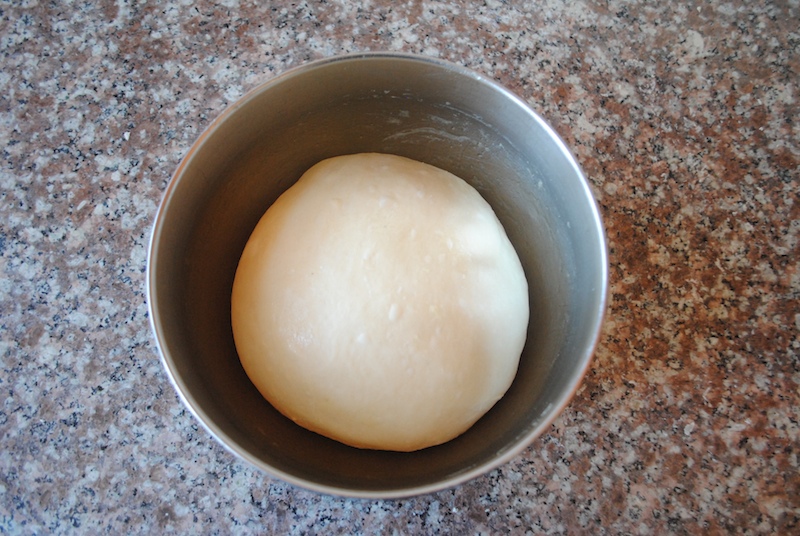
Start of bulk
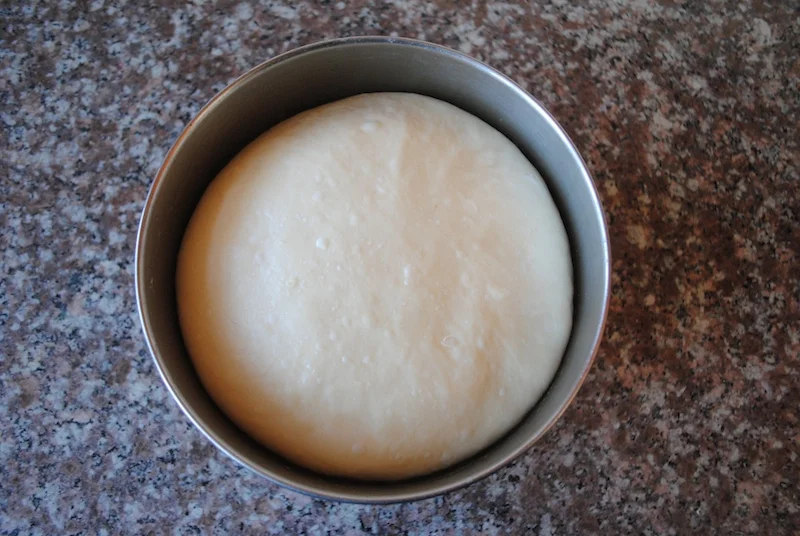
End of bulk.
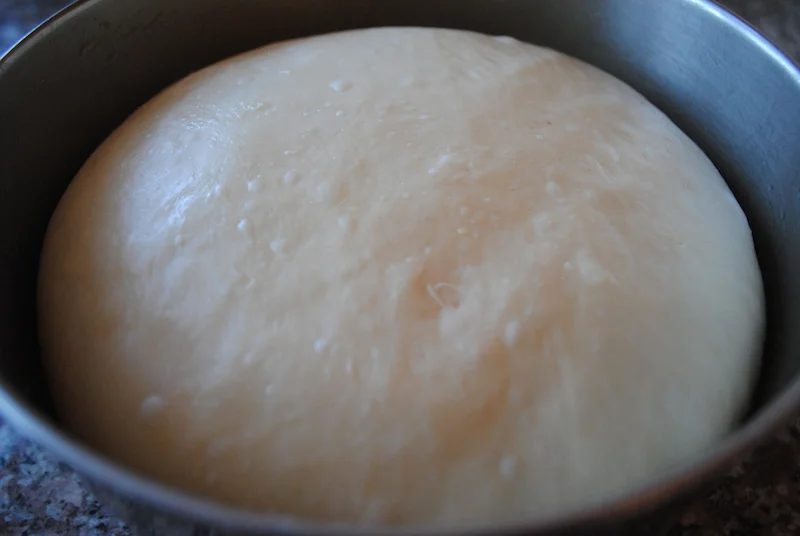
Notice the small air bubbles on the surface. If you were to touch this dough it would feel slightly airy yet still springy.
Make sure that when you reach the end of bulk fermentation that you write down the time. In fact, you should be noting the time with EVERY step you do. These notes will be extremely useful later if you bake the loaf of your life and you want to remember how exactly you did it. They will be equally handy if your loaf completely fails as you can look back and see where you went wrong.
There is a good chance that every time you bake your times will be different and this is completely normal. In fact, it is a GOOD thing because it means you are judging the dough and not following strict times. Eventually you will get to the point with your baking where you won't even need to know times. You will simply do steps when your dough tells you it is ready for them.
Pre-Shaping
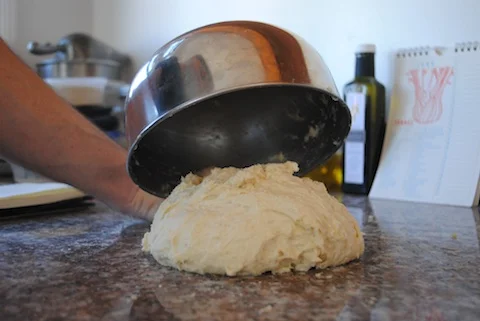
Once our dough has finished with bulk fermentation it is time to dump the dough out on the counter and pre-shape it. This is also where we would divide the dough into smaller loaves if we were doing a multi-loaf batch size.
Pre-shaping is exactly what the name implies. It is a first shaping of the dough, before we do a final shape, that is done in order to have a more uniform shape to work with.
Pre-shaping also gives the baker one last chance to control the strength of their dough. If the dough feels weak then you should pre-shape tighter. If the dough feels too strong then pre-shape lighter. We don't expect you to know at this point whether your dough is too strong or too weak, however, it is something that takes time and practice to learn. Just focus on getting a nice round shape and we will focus on dough strength in later lessons.
For this loaf, we will be pre-shaping the loaf into a round shape or what the french call a boule.
- Start by dumping the dough out, top side down, onto a floured work surface. You don't need much flour. Just enough to keep the dough from sticking but no more. We don't want to be incorporating much flour into the dough at this point.
- Once on the work surface, de-gas the dough by patting out the air bubbles. You can de-gas fairly aggressively with this dough since we don't want a crumb with a lot of air holes in it. Try to keep the dough in as uniform shape as possible while doing this as it will help with shaping.
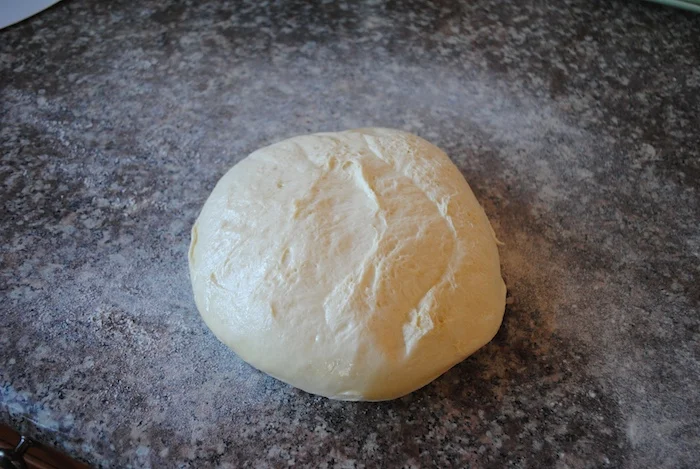
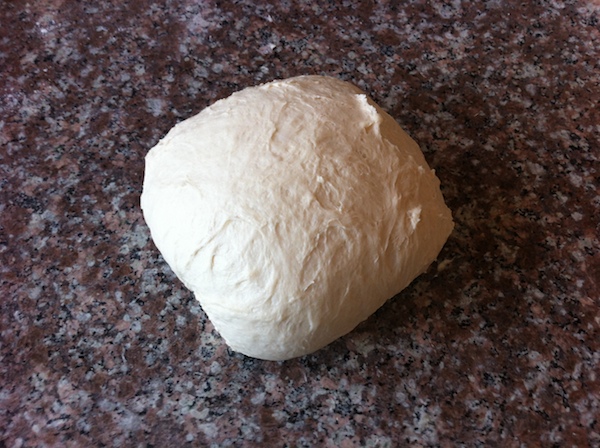
The turned out dough.
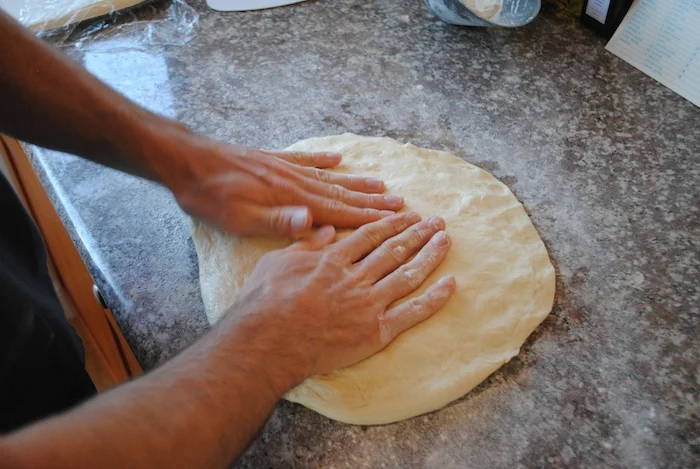
De-gassing
- After the dough has been well de-gassed, start the shaping by doing what is essentially another fold. Fold in all sides and then turn the dough right side up. You should now have a loose and not quite round looking boule.
- To tighten the boule, cup your hands behind the dough with the edges of your pinkie fingers and hands pressed against the work surface.
- Begin sliding your hands toward you making sure they stay in contact with the work surface. This motion will force the surface of the dough to tighten. It is absolutely key in this step that you do not have too much flour on the work surface. In fact, you should have almost none. If there is too much flour the dough will simply slide instead of grip the counter. Without the dough gripping the counter the boule will not tighten.
- Next, turn the dough a quarter turn and pull towards you again.
- Continue to turn the dough and pull towards you. You should feel the surface of the dough tightening and developing a round shape.
- You never want to pull the dough so hard that the surface tears. Tearing will hurt the appearance of your loaf when it is baked.
- Continue to turn and tighten until you have a boule that you are satisfied with.
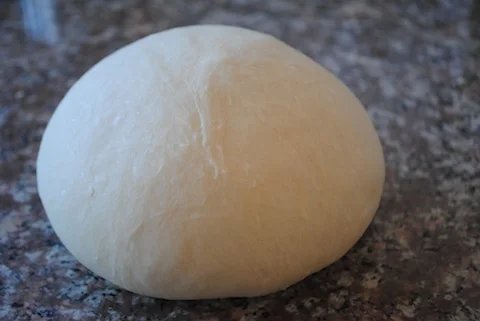
Click the following image to see an animation of the pre-shaping technique:

The finished boule pre-shape. Click the image for boule technique animation.
After pre-shaping, the dough must rest for 20-30 minutes to allow the gluten to relax to a point where the dough can be worked with again. If you do not let the dough rest it will resist everything you try to make it do. It will be very elastic. The rest will allow you to stretch the dough without tearing it during the final shape.
Final Shaping
The final shaping is where we form the loaf into the shape we want it to be baked as. For this loaf we will be shaping it as a pan loaf.
- Before starting your shape, lightly oil your loaf pan and have it ready.
- To shape the loaf, start by flipping the boule upside down on a lightly floured work surface. De-gas the dough thoroughly by pressing on it with your palms. Remember, we don't want any large holes in our crumb so make sure there are no large air bubbles in the dough. You really can't de-gas this dough too much.
- Do your best to keep the dough in a symmetrical round shape and a uniform thickness throughout. If you start out with an odd shape with uneven thickness it will be much more difficult to end up with a nicely shaped final loaf.
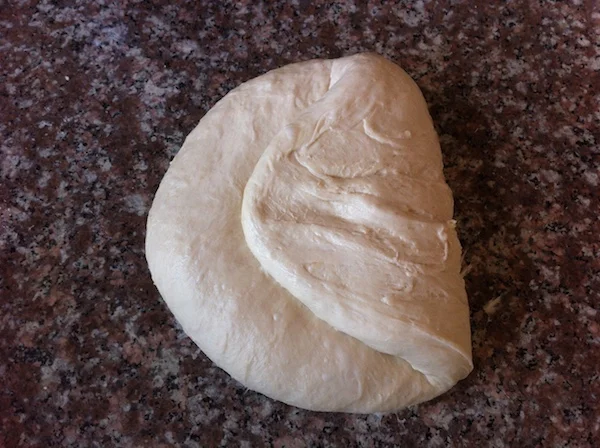
- Once the dough is nicely de-gassed, fold over the right side of the dough on to the center at a slight taper(see photos). Do the same with the left side of the dough. The dough should now be a triangular shape.
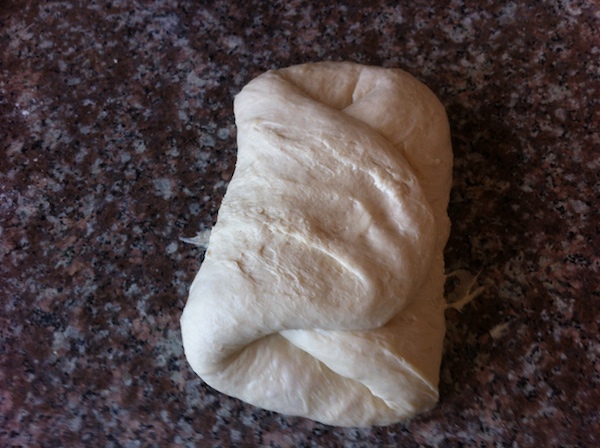
- From this point, you will roll up the dough, starting at the pointy end, as tightly as you can without tearing the dough.
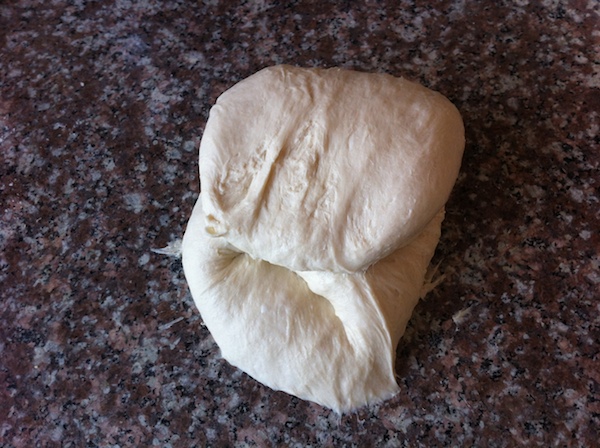
- When you have finished rolling you should have a loaf with slightly tapered ends. Tuck in these ends to make a more blunt looking loaf.
- Put the finished loaf into your oiled loaf pan seam side down and cover with plastic.
Baker's perspective
Observer's perspective
(Click on above images to view animations of the shaping)
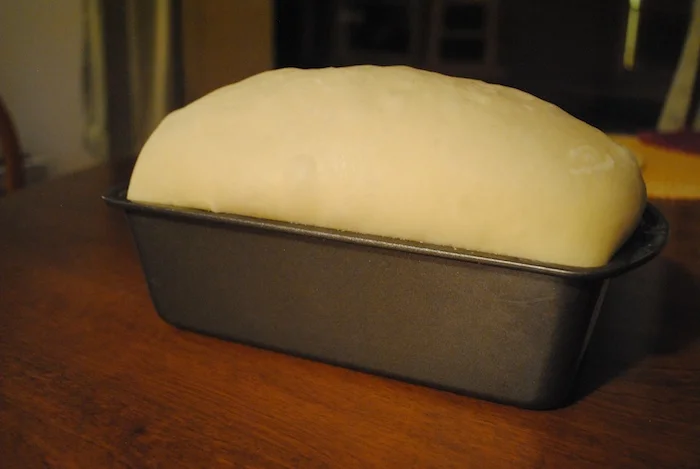
Final Proof
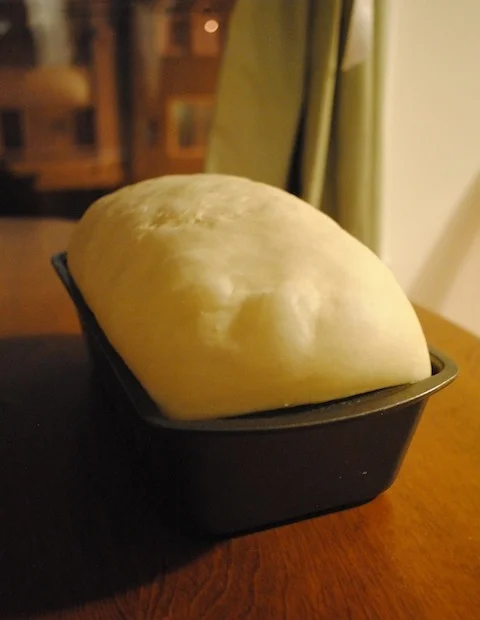
Fully-proofed Bread
Before baking our loaf we must let it proof. Proofing is baking speak for letting the loaf rise again. Allowing the loaf to proof accomplishes several things for us.
- First, proofing allows the yeast to fill the dough with gas. This is what gives our loaf volume and a soft crumb. If we didn't allow for the final proofing time then our loaf would be dense, heavy and it would lack volume.
- Proofing allows us to have a controlled rise when we bake the dough. If we didn't proof, there would be too much energy left in the dough when we bake it. This would result in a loaf that "explodes" in the oven. It would burst in ways that we don't want and can't control. One of the best ways to tell if you are under proofing your bread(not proofing long enough) is if it bursts in an extreme way or in spots you didn't intend it to. Proofing the bread properly results in controlled bursting.
- Proofing continues to develop flavor. While we are proofing the bread, fermentation is continuing to occur and is in turn makes our bread more flavorful. The effect is not quite as strong as in bulk fermentation when the dough is sitting in a larger mass but flavor IS being developed(Again, this is not relevant for us in this lesson because we are doing a single loaf batch size).
Judging The Final Proof
Judging the final proof is one of the most difficult aspects of baking and takes much practice to get right. Here are some tips to help you determine if you have proofed your dough long enough:
- The dough should have gained significant volume. Doubling or tripling in size is common.
- Feel the dough with your hand. Shake it slightly. Does it feel strong or weak? Does it feel like there is a lot of air in it? Does it feel like it can continue to proof without collapsing? The dough should feel quite airy and light. However, it should also feel like it has some strength left in it. If it feels like it is close to collapsing then you've gone too far. The dough should be proofed to around 80-90% of its capacity. You need to leave some energy left for the oven.
- Poke the dough lightly with a floured finger. Poke about half an inch into the dough. If the dough springs back quickly then it needs more time. If the dough springs back slowly then it is ready to bake. If it doesn't spring back at all then you've gone too far. Make sure when you do this test you poke is several different places in the dough. Sometimes the dough will spring back fast in some places and slowly or in others. You must check all around the dough to get an accurate assessment.
How To Tell If Your Proofing Was Good
After your bread is baked there are some things to look for that will help you determine if you proofed your bread well.
- If your bread rose well in the oven, has nice volume and a light feel to it then there is a good chance that you proofed your bread properly. Congrats!
- If your bread burst in odd places, seemingly uncontrollably, or is dense, lacks volume or feels excessively heavy then it is likely that the bread was under-proofed. Try proofing a little longer next time.
- If your bread didn't rise in the oven or collapsed on itself then there is a high probability that it was over-proofed. You will need to get it in the oven a little sooner next time.
Proof Time for Our Loaf
For the loaf in this lesson the proof time should be 1.5 to 2 hours. The rate at which the loaf proofs is dependent on the temperature of the dough so the time will definitely vary. Use the tips above to help determine when your loaf is ready to bake. The images below show what your loaf should look like when it is fully proofed.

Baking the Loaf
We will be baking our loaf at 375 degrees for approximately 40 minutes. Make sure that your oven is hot and ready when your loaf is finished proofing. If you wait to heat the oven until your loaf is at the right proof amount then it will be over proofed by the time the oven is ready.
Steaming the Oven
When you bake bread you need to steam your oven for the best results. Without steam, the crust will begin to set before the loaf has fully expanded causing less overall volume and unpredictable bursts. A properly steamed oven will keep the crust pliable allowing the loaf to reach its maximum size. Steam also gives the sugars in the crust time to caramelize properly. An improperly steamed loaf will never color well and appear quite dull. A properly steamed oven is very important to the quality of loaf produced especially with artisan style breads. Unfortunately it is also quite difficult to accomplish in a home oven.
There are many ways to get steam in your oven and we will be covering them in a future lesson but for this first loaf we are going to use a very simply method that doesn't require steam at all. It is not the method you will want to use if you get into artisan style french breads but for our sandwich loaf it will work well enough and won't require you to have additional equipment.
Right before loading your loaf into the oven, brush the top of the loaf well with water. It should be visibly wet. This layer of water will simulate a steamed oven and give us some of its benefits.
Loading and Baking
To load the loaf simply set the pan containing the loaf onto the center rack of your oven. Close the door immediately and set a timer for 20 minutes. Do not open the door during this time as we want the oven environment to stay as moist as possible.
After 20 minutes, check on your loaf. Look at the color. If your loaf seems like it will be too dark by the time you reach 40 minutes turn down the temperature by 25 degrees. We really want our loaves to reach the full 40 minutes before we take it out otherwise it may be too moist inside or not completely baked throughout. Going longer than 40 minutes to get a darker colored crust is acceptable as long as it is not excessive.
How To Tell Your Loaf Is Done
The easiest and most accurate way to tell your loaf is done is to insert your instant read thermometer into the center of the loaf and note its temperature. If the temperature is above 190 degrees then the loaf is baked and you know it won't be doughy inside. However, it would be smart to continue the baking until the internal temperature is 210 degrees. Baking to this point will get rid of excess moisture in the loaf and allow time for a stronger crust to set.
It is recommended that you also bake to the color you want your loaf. If you prefer a darker crust but the loaf has already reached 210 degrees by all means continue to bake the loaf until you reach the color you are looking for. It will not hurt it. Just don't go excessively longer, say 45 minutes or so. Doing so may dry out the loaf excessively and form a very thick crust. If it's taking you that much longer to get the color you are after than your oven is not hot enough or your loaf wasn't kept moist enough during the first 10 minutes of baking, preventing the sugars from fully caramelizing.
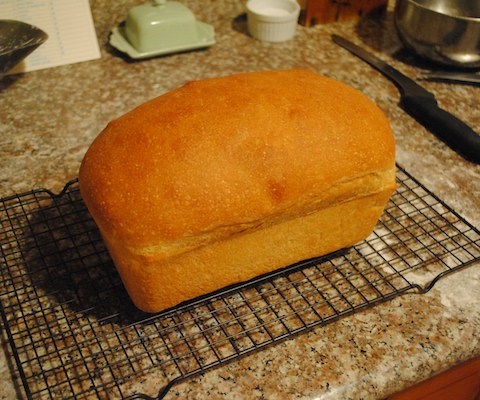
Once your are satisfied that your loaf is fully baked remove it from the oven and immediately remove it from the pan. Allow the bread to cool in the pan would trap steam trying to escape the loaf and cause the crust to get soggy. Allow the loaf to cool on a wire rack or in place that allows air to circulate freely around it.
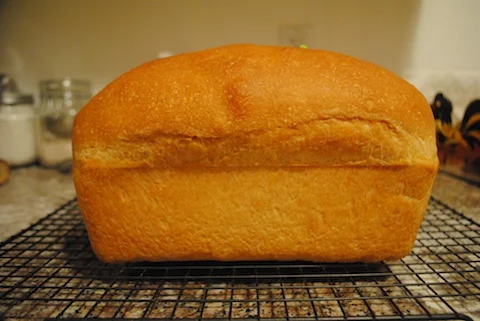
The fully baked bread cooling on a wire rack.
It is a good idea to let your loaf cool at least 20 minutes before slicing it as this will allow the crumb to set. You will not be able to taste all the final flavors of the bread at this point, however. The true flavors of the bread will not be detectable until the bread as fully cooled but if you can't wait that long then by all means have some!
Wrap Up and Next Steps
So how did your loaf turn out? Hopefully it is an amazing loaf of bread! If the loaf didn't come out to your satisfaction go back and review your notes and re-read this lesson. Look for clues as to why something might not have gone the way you expected. Try again. The best way to learn about baking bread is to make a lot of it and note how you get different results by changing times, temperatures or technique. Remember that no loaf of bread is a failure as long as you learn something from it.
Congratulations on getting through this first lesson! You are well on your way to becoming a skilled and successful baker. When you are ready to move on try our next lesson on baking with whole wheat flour.