
Bread FAQ Part 3: Crust
Part three of my bread FAQ series is all about crust. How does one go about achieving a crust with beautiful color, wild blisters and stunning contrast. There are a lot of factors that go into making this happen and they all need to work together to get the right result. Let's get started.
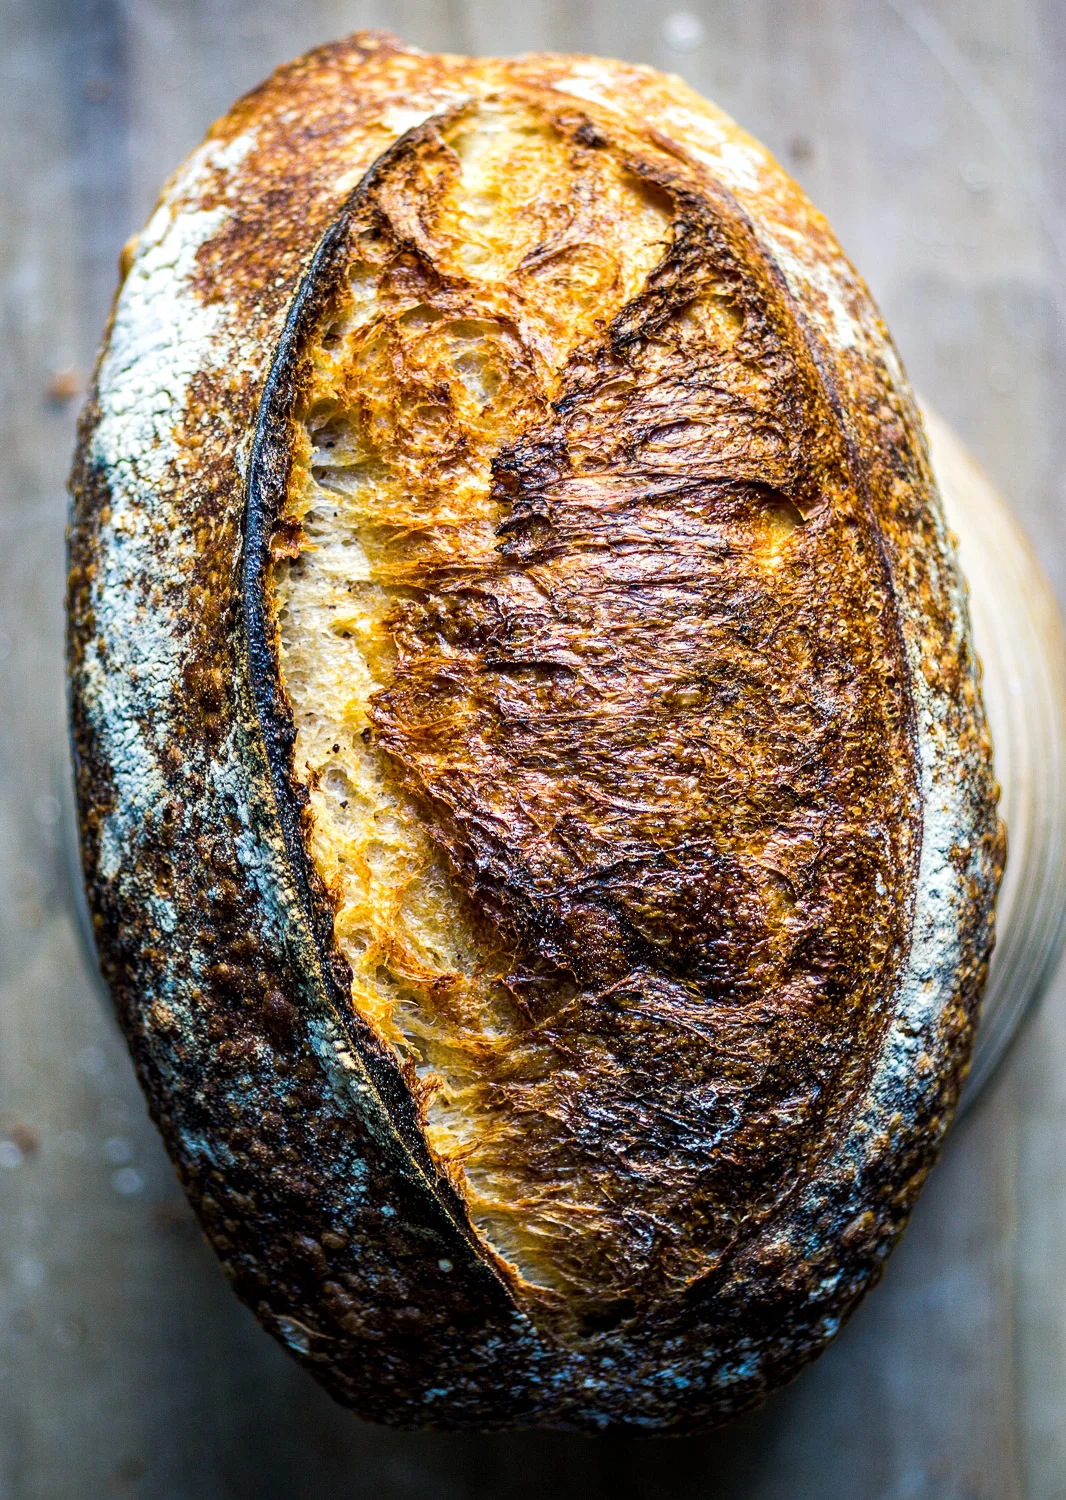
First, let's talk about what makes a great crust in my mind. Color should be a nice medium caramel. Too light and you miss out on a lot of flavor. Too dark and your bread starts to taste like carbon not to mention when you go to toast it the crust instantly turn black and is inedible. Taking your crust just short of burnt is much too far in my opinion. I like a lot of blisters on my crust as not only does it show off all the fermentation visually but it also contributes a lot of pleasing shattering texture when you bite into it. Finally, I love to see a lot of contrast on my loaves. There should be a wide array of colors and shades. The colors should be vibrant and have a lot of life to them. The crust itself should be very thin but crispy and never go soft.
Now let's talk about how to get there:
COLOR
There are a couple of factors that determine whether you'll end up with a well colored vibrant crust or one that is dull and lifeless. First off, you need proper fermentation in your dough. A loaf that is under fermented or over-fermented will never reach full potential in crust color while hitting the fermentation just right leaves plenty of sugars in the dough to caramelize perfectly. Obviously, getting the fermentation right has a massive impact on other important aspects of your bread too like flavor and volume so this is something to always be working on.
STEAM
The other important part of crust color is steam. There's no way around it, you're going to need a lot of steam to get great color. In general, the more steam you have in your oven the more caramelization you're going to get and caramelization = color. Too much steam is possible, however, and can actually have a negative effect on your crust. If you over-steam your oven, water will actually accumulate on the loaves, preventing blisters from forming and leaving a matte and dull look to your loaves. One sign of this is if the flour on the outside of your loaves is turning yellow and not staying white it could actually be turning into a dough itself from the excess water caused by over-steaming. This shouldn't be a problem for most people but I have noticed that many modern deck ovens are capable of over steaming rather easily if the baker isn't too careful.
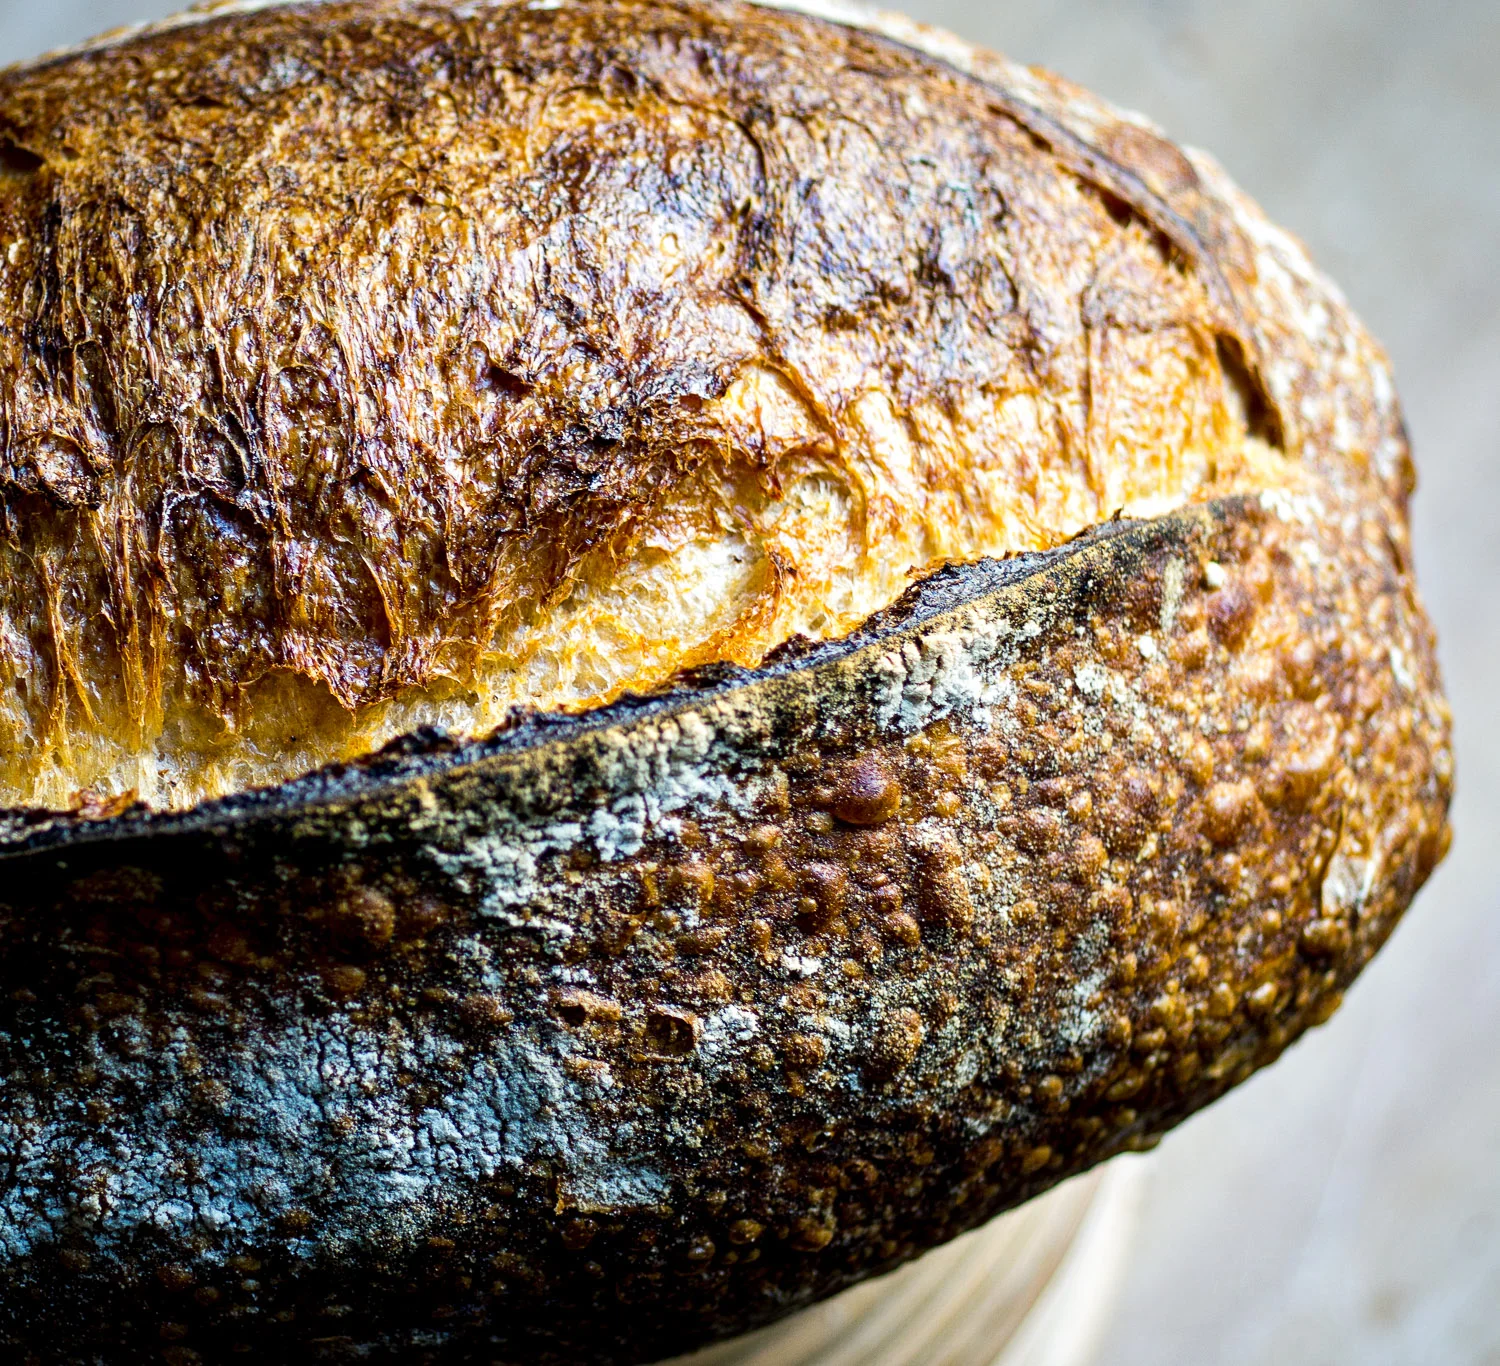
At the other end of the spectrum, and this is a problem the average baker is more likely to have, is under-steaming the oven. Without sufficient steam a loaf will never color well. This is because the outside of the loaf passes too quickly through the temperature range ideal for sugar caramelization to occur. Steam supplies moisture to the crust and keeps it from drying out too quickly before the enzymes that are responsible for releasing the sugars that will caramelize have a chance to do their thing.(The Bread Builders has a great section on this if you want to know more. Pg. 102) Under-steam loaves look very dull, lifeless and matte. They go from pale to burned with no real in between.
BLISTERS
Finally, let's talk blisters. Not everyone wants their crust to be blistery but if you do here's how to get them: First you need to be retarding your shaped loaves at cold temperatures for long periods of time. The blisters form when co2 escapes the surface of the cold dough. Generally, the longer you retard your dough, the more blisters you're going to have. Second, whiter doughs tend to have more blisters. The more whole grain flour you introduce to your dough, the less blistering you are going to have, although it is still possible to have some blistering on 100% whole grain loaves if everything goes right. Steam is also an important factor. Too little steam and the crust dries out before blisters can form. Too much steam and water condenses on the outside of the loaves and suppresses the blisters. One cool thing to note is that blisters don't seem to form until about 8-10 minutes into the bake and the loaves are nearly fully risen. You can actually see them form in this video I made posted below. This would suggest that you should keep steam in the oven for at least 15 minutes to ensure the blisters have had every chance to form before you dry the oven out.


Finally, to maximize blisters, your shaped loaves need to be proofed in a basket or on a couche setup that allows the surface of the loaf to breath while proofing and is easily turned out for baking with minimal resistance or sticking. This is because the blisters that form on the surface of the loaf are very delicate and even the slightest sticking will destroy their potential. I have noticed that proofing in a plastic basket will almost never yield blisters while proofing in a cloth lined basket that allows the loaf to breath overnight and doesn't stick produces beautiful blistering.
SOFT CRUST
Lastly, I want to talk about keeping your crust from going soft. Out of all the crust issues this is probably the easiest to fix. If your crust is becoming soft too quickly and not staying crispy you simply need to bake the bread longer. The best way to do this is to lower the temperature of your oven slightly and bake a few more minutes to achieve the same color you would have at the higher temperature. In these few extra minutes your crust will have more time to dry out and more moisture will be baked out of the loaf. As a result, your crust will stay crispier, longer. You will probably need to play quite a bit with the relationship between temperature and time while baking to find the balance that is just right for your particular set up. Just remember: the bigger your loaves are the longer they need to bake and the more hydrated your loaves are the longer they need to bake as well.
That's all for now! Feel free to leave a comment or any questions you have below.