
Baking Bread with Whole Wheat Flour
How to Use Whole Wheat Flour Effectively in Bread Baking
If you want your bread to be healthier, have a more robust flavor or you're just tired of baking white bread then you will probably want to start experimenting with some whole grain flours in your breads. Whole wheat flour will probably be your first choice because it is easily available in most grocery stores, it's familiar and it's not too much different from working with a white flour. However, there are differences and challenges to working with whole wheat.
You can't expect to exchange white flour with whole wheat flour one to one and expect your breads to come out great with out making any other adjustments. There are some important considerations you must take into account to make things work. This lesson will teach you what kind of adjustments you need to make in order to use whole wheat flour successfully in your breads and get great results.
Note: If you haven't already completed or at least looked over lesson one then we highly recommend you start there. We will be using many of the techniques and processes that we learned in lesson one in this lesson and we won't be covering them with the same kind of detail here. If you have already completed lesson one you may still feel the need to reference it throughout the lesson(it's a lot to remember!) so we have included a link to it at the top of the side bar on the left.
Lesson Overview
In lesson we will cover:
- What whole wheat flour is, how it is made and the best ways to store it.
- How whole wheat flour absorbs water differently than white flour and what changes the baker needs to make to dough hydration(water content in relation to flour content).
- The ways whole wheat flour effects dough strength, gluten development and our ability to produce a loaf with nice volume.
- The faster fermentation rates of whole wheat flour.
- At the end of the lesson, there will be a formula for 50% whole wheat sandwich bread for you to test your new whole wheat knowledge with!
What is Whole Wheat Flour?
A kernel of wheat consists of three parts: the germ, bran and the endosperm. A white flour is made up almost entirely of the endosperm which is comprised of starches and proteins. These proteins and starches allow a baker to create a dough with a lot of strength that is able to trap the gas produced by the yeast and this in turn gives the dough volume. Without the endosperm your dough wouldn't be able to rise or retain a shape. This is why baking with a white flour is so forgiving. It is made up entirely of the stuff that gets your dough to do the things you want.
The drawback of baking with only the endosperm is that you lose out on all the vitamins, minerals, fats and fibre that are contained in the germ and bran. These areas are where all the health benefits of wheat reside. This is where whole wheat flour comes in. It is essentially the entire kernel of wheat ground up into flour form. It is packed with nutrition and flavor.
How Whole Wheat Flour is Made
There are a couple ways that whole wheat flour is produced by millers. Most large mills seem to first create white flour by grinding up wheat berries and sifting out more and more of the bran and germ in stages until there is only endosperm remaining. Then, the miller will reintroduce the germ and bran to the white flour to create the whole wheat flour. Milling in this manner allows the miller to create different whole wheat intensities by adjusting the amount of bran and germ they combine with white flour. The other way to create whole wheat flour is simply to grind up a wheat berry and leave it as is. Whole wheat created in this way is supposedly superior but it is unlikely that you will see that much difference in your products between the two methods.
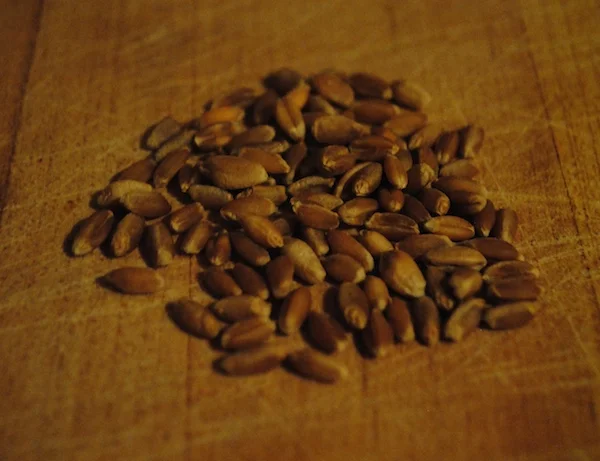
Wheat Berries
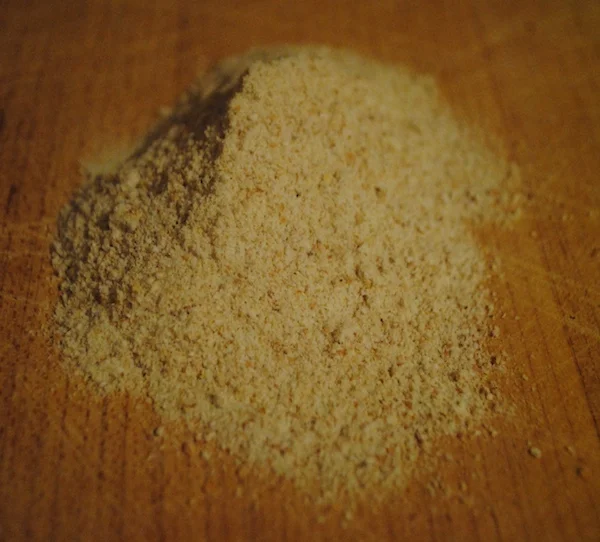
Whole Wheat Flour
Whole wheat flour can come in a variety of consistencies from extra coarse to extra fine. The various levels of grinding will result in bread with different textures. An extra coarse grind will give your bread a more whole grain texture while an extra fine grind will give the bread a smoother texture.
Storage
Because whole wheat contains more fats and nutrients compared to white flour it is best to store it in the fridge or freezer if you don't plan on using it within a month or so. If left at room temperature for extended periods of time whole wheat flour will turn rancid.
Hydration Changes When Using Whole Wheat Flour
When using whole wheat flour it is necessary to use more water in your dough compared to using only white flour. This is because the germ and bran that are present in whole wheat flour can absorb more liquid than the endosperm.
For example, if you were to create two doughs, one entirely of white flour and the other entirely of whole wheat flour, and you used the same amount of water in each, the whole wheat dough would be significantly drier than the white flour dough. A change like this can have drastic effects on the final product. This is why it is necessary to add more water to doughs that contain whole wheat flour vs their white flour counter parts.
In general, the more whole wheat flour in the dough, the more water you will need to use.
Dough Strength and Gluten Development
One of the biggest problems that bakers encounter when using whole wheat flour is a lack of volume in the final loaf. The dough never really rises as much as they would hope or they end up with dense bricks and are baffled as to why. The truth is that getting a whole wheat dough to rise properly can be a little tricky and the more whole wheat you use in your dough the more difficult it becomes.
This problem occurs due to the bran and germ that is present in whole wheat flour. You see, when you are mixing your dough and kneading or folding it you are aligning and strengthening the gluten strands in the dough. These strands give the dough its strength and are what allow the dough to trap the gas produced by the yeast which results in volume. The bran flakes and germ in whole wheat flour act like tiny little razor blades that shred these strands, inhibiting gluten development. The more whole wheat flour you use the more bran and germ there is in the dough and the more the gluten gets shredded. This is why as you increase whole wheat flour you usually must expect a decrease in loaf volume.
But don't let this scare you away from baking with whole wheat! This issue can be dealt with. One way is to blend the whole wheat flour with white flour(something we will do in this lesson). Blending whole wheat and white flour creates an easier to work with, lighter textured and tasting loaf that will produce decent volume. Blending is a great way to start out working with whole wheat flour and allows you to progressively increase your whole wheat with each successive loaf until you are baking with 100% whole wheat.
Folding and Shaping
Because of the weakened state of dough made with whole wheat flour it is important to handle the dough gently. When shaping, the dough will have a tendency to tear much easier than when using only white flour and you will not be able to get the dough as tight. Adjust by shaping a little more loosely than you would with white bread.
The same principles apply when doing your initial folds. You will not be able to stretch the dough quite as much without tearing it and as a result the folds should be a little looser.
Fermentation
All other things being equal, a dough made with whole wheat flour will ferment faster than one made of white flour. The reason for this is simple: whole wheat flour contains more nutrients for the yeast to feed on than white flour. If you are not prepared for this it is easy to over ferment your dough. In order to compensate for this effect a baker must either shorten fermentation times or reduce the temperature of the dough.
Formula
The formula for this lesson is exactly the same as in the first lesson but with two important changes: 50% of the white flour has been swapped for whole wheat flour and the water amount has increased slightly to properly hydrate this new flour. Starting with a relatively low level of whole wheat flour like this will allow you to adjust to the effects of whole wheat flour while leaving the rest of the formula untouched will allow you to see these effects more easily.
Formula: 50% Whole Wheat Sandwich Bread
| Baker's % | Ingredient | 9x5 Pan | 8.5x4.5 Pan |
|---|---|---|---|
| 50.00 | Whole Wheat Flour | 251.00 | 168.00 |
| 50.00 | White Flour | 251.00 | 168.00 |
| 65.00 | Water | 326.00 | 217.00 |
| 4.00 | Honey | 20.00 | 14.00 |
| 6.00 | Oil | 30.00 | 20.00 |
| 2.00 | Yeast | 10.05 | 6.68 |
| 2.00 | Salt | 10.05 | 6.68 |
| 179.00 | Total | 900.00 | 600.00 |
Process
The process for this loaf is very similar to the loaf from lesson one so we will not being going into as much detail here. We will just list the important need to know information for this loaf. If you are confused about any step please consult lesson one.
Process
- Scale all ingredients into a mixing bowl and combine thoroughly. Take dough temperature and let rest for five minutes. Our desired dough temperature is 74-78 degrees.
- Fold the dough once every five minutes for the first 15 minutes for a total of three folds.
- Bulk ferment for around one hour. Pay attention to your dough and remember the signs to look for from lesson one that will tell you when your dough finished with bulk fermentation. Also, keep in mind that whole wheat flour ferments faster so be ready to move on earlier than you are used to if needed.
- Pre-shape the dough round like in lesson one and allow the dough to rest for 25-30 minutes.
- Shape the dough as a sandwich loaf as demonstrated in lesson one keeping in mind that the whole wheat dough requires a gentler shaping to prevent tearing. Place the dough in an oiled loaf pan and cover with plastic wrap.
- Allow the dough to proof for 1.5-2 hours. Again, keep in mind that the dough may ferment faster than the white loaf from lesson one. Watch your dough carefully and look for the signs that it is ready to be baked. The weakened state of the gluten will also prevent the dough from gaining as much volume so do not rely on volume alone to tell you when the dough is ready for baking.
- Bake the loaf at 375 degrees for around 50 minutes or to desired color. Don't forget to brush the loaf with water before baking!
- When fully baked, remove the loaf from the oven and allow to cool for at least 20 minutes.
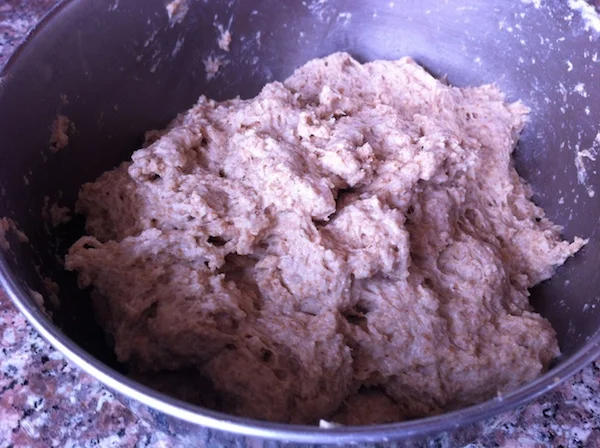
Just mixed dough.

The dough after three folds.
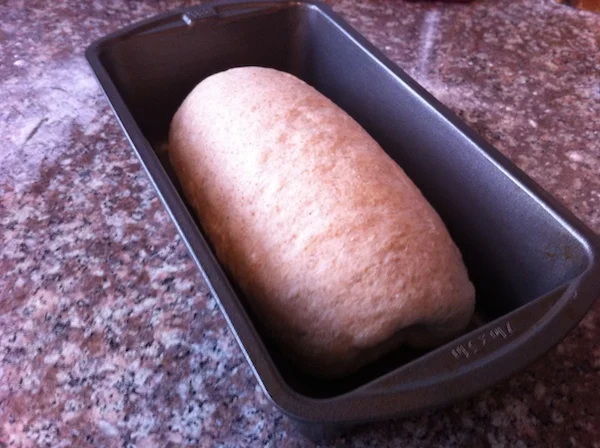
Just shaped dough.

Fully proofed dough.
Wrap Up
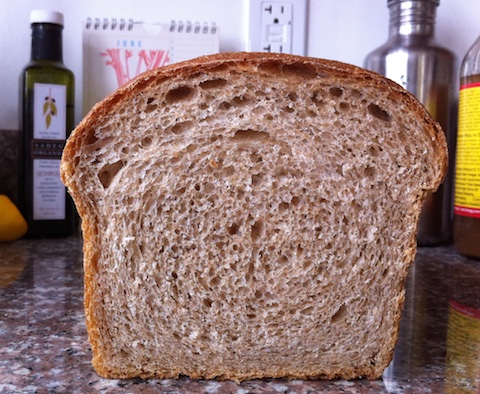
So how did your loaf turn out? Hopefully you produced a bread with a mild whole wheat flavor that has decent volume and many of the nice properties of the white sandwich loaf we baked in lesson one. If you are ready to try more whole wheat flour in your dough feel free to swap more whole wheat flour for the white flour. Just remember to increase the water content slightly and watch your fermentation carefully.
If your loaf didn't quite turn out like you'd hoped then try to determine what went wrong. Did your loaf overproof, underproof or maybe you didn't develop enough dough strength? Look back through lesson one and this lesson and look for clues that may point to what went wrong. It is figuring out the failures that really improve your baking.
We hope you enjoyed this lesson. More lessons will be coming soon! Happy Baking.
